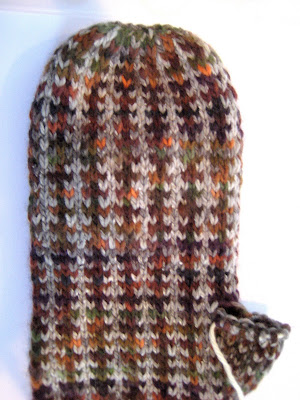
Showing posts with label fair isle. Show all posts

Friday, February 10, 2012

Colorwork 1 - choose yarn and colors

Worsted
Believe it or not, there's a little more to colorwork than just choosing two colors you love and putting them together.  Not a lot more, but more.

First, how do you choose colors?  For smooth and easy colorwork, choose two colors of the same exact fiber from the same yarn line.  As and example, two or more different colors of Classic Elite Inca Alpaca.  It comes in 45 colors, and provides variation across the color spectrum.  Why the same yarn line?

Stranded Colorwork
Not all yarns are created equal, and not even all yarns of the same fiber and weight are created equal.  As you can see in the example, these two "worsted" yarns are different thicknesses.  They are both from the same manufacturer, both merino wool.  One is superwash, and one isn't.  Depending on what you're making, this may not matter at all.  If you know not to launder the piece as if it were all superwash, great.  If you're felting, this is a problem.  A very slight difference won't show much in a stranded colorwork situation.  In stranded, each color stitch needs only to match itself in size.  If the other color is slightly different, it's fine. 

Fair Isle Swatch
If it's Fair Isle or striped, it will yell at you!  Fair Isle is entirely dependent on every stitch being exacly the same size, or the pattern wont work.  As you can see in the example, when they aren't, it's pretty obvious.  The red stitches were knitted much more tightly than the white, and the white are very uneven.  It's still pretty, but after the time and money you've invested in making a piece like this, you'll want it to look its best. 

However, if texture and striping are your goal, maybe you really want the yarns not to match.  In that case, run with it!  Or, maybe you're holding two yarns together for a marled effect, in which case you may choose two yarns of totally different weights to achieve just the color proportions you want.  The swatch in the example is made with a worsted wool and a bulky cotton alpaca blend, creating a very chunky, textured look.  The texture pops much more because of the two yarns held together than it would in either yarn alone.  (I know this because I tried it.)
Two Yarns Held Together
For the garment you're about to make, would you like it to coordinate with clothes you already own?  Maybe bring a garment you'd like to coordinate along with you when you shop.  Do you want to coordinate with clothes you haven't purchased yet?  Check the Pantone color chart for the season you'll be using the garment.  They keep archives of top fashion colors for years past, present, and future.  (Ever wonder how all the clothing manufacturers end up on the same page for color every season?  Mystery solved.)  Even if the clothes haven't been made yet, it's likely that the palette on Pantone will accurately represent the clothing choices you'll have in the upcoming seasons.  (Not sure?  Check it out here.)

Yes, there's more to it.  We'll go over it in the next several posts.  You'll be great at this!

Protected by Copyscape Online Plagiarism Checker

Monday, February 7, 2011

OOPS! One More Mitered Mitten - Thistle

Just when I thought I had posted all of them, I came across one more mitered mitten... Here it is.


Materials: Size 5 needles
Cascade Yarns 220 Sport

Main Color - White
CC1 - Green
CC2 - Purple

Makes women's size large mittens. For smaller or larger size, decrease or increase needle size respectively.

Cast on (52 sts) in CC2 for the ribbed cuff.  I like the cuff in just one color, as a 2x2 rib.  In the solid color row before the main mitten pattern, increase one stitch every 8 stitches to achieve the 60 sts needed.

On the single white rounds between the stem and the bloom, SLIP the colored edging stitch from the row below to carry color on the edge.  For the white rounds between the bands of flowers, use white in the edging stitches.  If you really want those stitches colored, you can go back and duplicate stitch them.

This pattern is designed in the round, with a mitered top and a mitered afterthought thumb.  It can be worked flat, using the edges of the pattern for seaming.

The pattern for the back and front of the thumb is the same, so it is listed only once above.  The blue lines on the palm of the mitten body represent where to knit with scrap yarn for thumb placement.

Happy knitting!

Thursday, January 20, 2011

Mr. Mittens, Cloth/Square, Etsy

I've finished one mitten body of the Manly Mittens I'm making for the Mr.. I am accepting that the decreases in the pattern as written are all one direction, making it easier for a knitter new to colorwork to finish off the shaping and closure of the mitten.  The pattern is not quite maintained for the last 7 rows, and if this is not your preference, you can substitute mirrored increases.  I knit the pattern as written just to see how it looks. For those who are really OCD about patterning, this won't work, but generically I'm impressed that there is as little interruption as there is. 

Keeping in pattern during decreases for new Fair Isle knitters is like trying to put pantyhose on a kitten.  It's not too successful, and everybody loses. This is an ideal solution.  I showed the Mr., and he loves it, insists that it needs a thumb, and never even noticed that the pattern changes a little toward the top.

I've added another baby blanket/dishcloth square to the collection today.  It really takes a long time to get things translated from original drawing to uploaded computer file!  Soon there will also be an Etsy shop will more involved designs available. First, I need to tackle my pharmacology final, though. 

Tuesday, January 18, 2011

Better Than Chocolate, Mr. Mittens

Better than chocolate, really.  Oh, man!  Epiphany by Cascade is incredible.  60% Royal Alpaca, 20% Cashmere / 20% Silk, this yarn is a worsted weight that comes in 12 beautiful colors.  Better than that, it is the softest, easiest to work with alpaca blend I've ever touched.  It's very warm, and due to the silk and cashmere contents it's strong and it doesn't grow! The price is good, too.  At Karma Knitting in Williamsville, it's $28 for 273 yards. Why better than chocolate? Delicious without calories!


The Mr. Mittens are going along nicely.  (See Manly Mitts in Free Patterns, above)  Making the substitution of needles has really done it this time.  The pattern is easy to knit and easy to follow.  I'm teaching a version of this pattern in a mitten class this Sunday as a "First Fair Isle" project, and wish I had started on something like this!  The carries are short (translation - easy) and the pattern is only 4 stitches wide and 2 rows long.  If Fair Isle makes you nervous, I would suggest these as a project to get over your fear. 

Most people worry about the pattern puckering, which is the most common problem for folks new to the technique.  I suggest you pay attention to your carries (the yarn of the color not used on a particular stitch is "carried" behind.)  Bring them along at the same tension you always would, even if you're just taking the yarn from one stitch to the next.  No tighter, no looser.  Your work will be flat and smooth.

Folks also complain about the two colors getting twisted up between the work and the skeins, but there is a simple solution.  Once you introduce your contrast color, choose one yarn to be "the bottom" and one to be "the top" yarn. (Usually the contrast color is used as the "top" yarn, as it will have slightly smaller stitches and therefore be slightly less prominent.)  As you drop the "bottom" yarn to knit with the "top" one, make sure you always bring the "top" yarn over your working yarn. Bring the "bottom" yarn up under the working yarn when it's time to use it again.  If you do this, your colorwork will be even smoother, and your yarn will twist rarely.