Tuesday, June 28, 2011

Knitting Math 5 - increases and decreases

Ok.  We've covered gauge, long and short horizontal repeats, and vertical repeats.  Yes, there is still more, and we'll take the next step in little bites.  How do you place increases and decreases in an even way?
There's one equation in this math that is absolutely critical:  Stitches you have - stitches you want for decreases, and stitches you want - stitches you have for increases.  The answer will be stitches difference, or the number to decrease or increase respectively.  Grab your calculator and a pencil, and let's do it.

You know I love mittens, so I'm going to use them as the example here for increases.  In my cuff I have 40 stitches.  I need 48 for the body of the mitten, and the instructions say "distribute increases evenly" for the increase row - no specifics.  Yikes!

48-40=8, so I need 8 more stitches.  How to do it evenly?  Divide.  Divide stitches you have BY stitch difference= number of stitches between increases/decreases.  In this case, there are going to be 5 stitches between increases.

The way to implement is to knit a couple of stitches in the beginning of your row or round.  Increase one.  Then knit 5, increase one across or around.  The increases will be even, and they will be a couple of stitches in from your edges, making any seaming necessary easier.

The example here for decreases is a skirt on a child's garment.  The original skirt has 56 stitches.  The decreased row has 40. 

56 (stitches I have) - 40 (stitches I want)=16, so I need to decrease 16 stitches.  56/16=3.5.  Three and a half stitches between decreases - - ?  I have no idea how to make a half a stitch, but I can trade off between 3 stitches + one increase, and then 4 stitches + one increase.  That would work.  OR I can take that .5 (a remainder) and realize that it represents 8 stitches (3 x 16 = 48 48 +8 = 56).  I can put half of them at the beginning of my row or round, and half at the end.  I'll knit 4, then K3, M1 until I get to the last 4 stitches. 

Unless it's stated otherwise, do not increase or decrease on the first two stitches of a row or round.  It makes seaming much easier.  If your pattern tells you to, then do as it says. 

Monday, June 27, 2011

Making Patterns

Sketching is fun.  Getting an idea together with my colored pencils and some paper (and some coffee) is really cool. Turning those sketches into a pattern is a little tougher.  Add to that combining yarns, and thereby gauges and stitch counts, and it all gets a little complicated.  In some ways, that's what makes it fun.  But in some ways, when the sample goes wonky due to some unanticipated clash between design and human anatomy, it really ROTS!
I'm poking along right now on a sweater for winter 2012, featuring all kinds of texture.  I'm discovering that I really love designing cold weather knit wear, and have to be much more inspired to create warm weather knit wear.  Maybe it was getting caught in a snowstorm in Yellowstone last week, or maybe it's just my nature, but I'm feeling some cozy coming on.

All of this has lead me to a whole lot more knitting math, so I will be jumping in and continuing the series later in the week.  In the meantime, Seven Things that can "Make or Break" a Sweater™: Techniques and Tips for Hand Knitters, by Margaret E. Fisher, has some terrific knitting math.  I had never seen this book before last week, and am a little desperate waiting for my copy to come in the mail. 

Ms. Fisher has a very different approach from mine, teaching all the math as it pertains to one project - in this case a cute baby sweater.  I only got to scan someone else's copy for a minute, but I'm in love.  If any of you have read the book or made the sweater, tell me!  I'd love to know what you think! 

Thursday, June 23, 2011

Mountain Colors Yarn

It's Thursday, and I'm back at home now.  I spent the night in DC due to poor weather and subsequent flight cancellations.  Yuck...  I would love to visit DC when I've PLANNED to, but not as a beleaguered traveller in a monsoon. 


The Sign at the Highway


 I promised photos of Mountain Colors Yarn dyeworks, so here they are. 
This is the sign out front that made me jump for joy (thank heavens I was the passenger and not the driver!)

We (Lisa, the BFF, and I) went in and were greeted by Diana McKay herself.  Diana and her friend, Leslie Taylor, started the dyeworks 19 years ago in their kitchens, and have owned the company ever since.  They were just back from the big TNNA conference, and even so, Diana was very generous with her time and materials to help us understand the company and products better.
Copper Mountain Colorway in 4/8's Wool
There is a wide variety of yarns available, including everything from lace weight to bulky to novelty, and most yarns are available in most colorways.  Each and every colorway contains nine different colors, making them unique and distinctive.  Although they didn't say so, they don't appear to use any colors they can't see out of their windows overlooking the Bitterroot Valley.  The valley has a distinctly Northwest palette of stone, river, grasses, buffalo, cattle, wildflowers, snow, and sky.  You'll find all of these tones in their yarns.


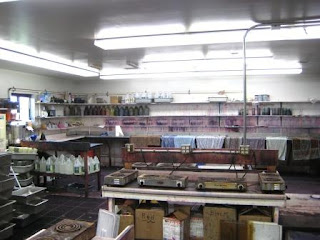
The current dye kitchen


Diana gave us a full tour, and this is the dye kitchen.  She explained that when they started the company, they both had small children at home, and needed to have a "family first" focus.  They have maintained this policy to this day, and many of their employees work from home.  "Nobody has to miss a soccer game or school play because of their job," she explained.  "We have a very low employee turnover.  People are happy here."

I can see why.  The few employees we met were cheerful, polite, and working steadily but not anxiously, in spite of the obvious work of re-stocking and bookkeeping after TNNA. 

Here in Buffalo, there isn't nearly enough of this yarn available.   It offers a unique style of variegation, and a great opportunity to add a new layer to colorwork.  I mentioned to Diana that I'd like to encourage local LYSs to carry the full line, and she generously loaded me up with a variety of yarns in a rich array of colorways.  I purchased yarn for a few projects of my own, and later today I'll be talking to some shops and advocating for more.

Visit their website, Mountain Colors Yarn for more info and to see the beautiful yarns.  They also offer a wide array of patterns.  If you can't get the yarns locally, try Paradise Fibers.  They carry the whole line, including the new and delicious Jeannette, a cashmere and silk blend. 

Tuesday, June 21, 2011

More Good Yarn!

I've been in Montana for the last 7 days, and I've had a wonderful visit with a dear friend.  As cool as the rockies, Yellowstone, and good company are, I was equally thrilled by getting to see Mountain Colors Yarns for the first time!  I've seen the worsted wool at a yarn shop, but I got to see the company HQ, located in Corvallis, MT.  My flight is boarding, so I'll post pics and the full story tomorrow.  Way cool!

Monday, June 20, 2011

Loopy in Missoula

This is Loopy, a super cool knit and crochet shop in Missoula, MT.  Run by a mother-daughter team, it has a delightful atmosphere, as shown by these photos of the shop.  Everything about the place encourages creativity, and Cindy, the mom of the ownership duo does an amazing job of making everyone feel right at home. (I didn't get to meet Gini, the daughter.)  Stock includes a little of everything, alpaca to bison to cashmere to wool, and everything in novelties and notions. There is a focus on local and sustainable, and there are a dozen or more beautiful projects to feed your inner stash hound.

What I noticed the most was the riot of color!  The first two photos above are from the outside of the shop.  The "Yarnheads" in the window are a great preparation for what's inside.  The shop has a mood that is both peaceful and joyful.  It's not the sort of place one leaves in a bad mood.  Everything about it is uplifting.

When Lisa (BFF) and I arrived, there were laughing shoppers, cool music quietly in the background, and a young lady named Ellie sitting and knitting.  As Lisa shopped, I asked Ellie what she was making.  "Well, a mess.  I mean, it's a hat, but right now I'm having some trouble."

I'm not bashful, and completely forgot that this isn't my shop or my student.  I just sat down to help.  For almost an hour, Ellie and I picked up dropped stitches, removed some k2togs that were in unexpected places, and smoothed out the work.  As it turns out, Ellie knits beautifully, and the hat is really cute.  The hat is for her boyfrined, which made me ask if she had ever read "Never Knit Your Man a Sweater..." She hadn't.

If you haven't either, the concept is that there is no reason to make a big knitting commitment to a guy you aren't committed to.  When you get "the ring", then you can make a sweater.  Until then, the stages of your relationship are measured in knitting projects.  Hats and scarves are for new relationships, sweaters and afghans are for long term partners.   A few college girls were in the shop at the time, and thought the book sounded hilarious.  I hope they get a copy!  Great stuff.

Anyway, I adore this shop, and could knit out of it for years without wandering.  Considering I'm a real fiber slut (I can't commit to just one) that really says something.  The delightful enthusiasm of Cindy is infectious, and really encouraging.  Her expert knitting and advice are the perfect support to the vast array of fibers and patterns.  And man, does she have books.  She puts any bookstore to shame with her selection of knitting and crochet titles, which is a real thrill for any fiber hound.  If you're in Missoula, or the general area, drop in.  I wish I lived closer!

Saturday, June 18, 2011

Yellowstone

I'm blogging from the desk of my dear childhood friend because my laptop can't find her wireless network.  That means at least for now I can't post pics, but I did finally find my camera! 

Hiking in Yellowstone has taught me that I am definitely a Flatlander.  Buffalo, NY is my home, and it is at sea level.  Yellowstone varies from 5800 to 8500 ft above sea level.  Above 6000, I had a really tough time!  Just walking from the car to the scenic overlooks were enough to give me side stitches as if I were running from a mugger.  My breathing was labored, my heart was racing, and I was TIRED!  Oh, well.  I won't be signing up for any marathons up here.

We have seen everything in the way of wildlife except a Grizzly.  The coolest was a cow elk nursing her calf.  The colors and animals and stones and "green" eco-theme of the park have been very inspiring in the way of my new project, working with sustainable yarns.  I've been sketching designs, and modifying others.  I think this trip will probably yield it's own collection. 

One thing that was impressively cool was to see bison/buffalo shedding their down.  It's the only part of the bison that becomes yarn, and they shed it in long, soft tufts that look like dread locks.  I took photos, and these guys look very Rastafarian at this time of year!  When the down has been shed, it is then cleaned (rinsed), dried, carded, dyed or not, and spun into amazing yarns.  If you haven't had the opportunity to work with buffalo yarns or blends, check out Buffalo Gold, an American company specializing in buffalo fibers.  These are not cheap, but they are magnificent.  They wear like iron, but feel soft and supple.  In the blends, they have good memory, but alone are a little unstretchy.  The website lists LYS who carry their product, and sometimes you can find it being sold on eBay. 

I'll post pics to this article when I can pull them from my computer.  Until then, I'll be in Big Sky country breathing hard and shopping for local sustainable fiber yarns!

Tuesday, June 14, 2011

Airports and priorities

Well, I've knit in 4 airports and on three airplanes today.  I've cranked out a set of mittens (no surprise), and landed safely in my destination of Missoula, MT.  Unfortunately, my checked baggage didn't make the trip. 

My priorities when packing the carry on were - knitting, Kindle, laptop, gifts for friend, and granola bar.  Perhaps I should have put more of a priority on undies, toothbrush, and pj's.

All in all, sitting in the restaurant/bar in the airport restaurant, which strangely doesn't serve food, (my friend is late), knitting over a laptop and a cold pint of Moose Drool beer, things could definitely be worse.  The Cascade Mountains look spectacular out the window, even if the luggage isn't here, I am, and none of the knitting stuff is lost.  It doesn't suck. 

Sadly, I've managed to lose track of my camera, so I can't take pics.  I've lifted this one from the web. 

Saturday, June 11, 2011

Knitting Math - 4 Vertical Patterns/Repeats

We all know by now that we need to keep an eye on our stitch gauge.  The number of stitches per inch is how we know whether a piece will be the size we were aiming for: too few and it's too big, and too many and it's too small.  But what about row gauge?

This is not the time to get faint of heart.  Row gauge is important for many types of patterns, and nearly always for vertical patterns.  Colorwork only works in exact numbers of rows (not "knit 4 inches"), and if your row gauge is off, your piece will be too long or too short.  Shapes that were intended to be circles become ovals, squares become rectangles, and the pattern becomes a funhouse mirror version of the original.  Knowing your row gauge makes several things easier.

The socks at left were knit and posted on Ravelry by Stacey14, from a pattern by Priscilla Gibson-Roberts in her book, Ethnic Socks and Stockings.  There are several patterns here, some running vertically and some horizontally.  If you need to shorten or lengthen a vertical repeat, what do you do?  Maybe you want a shorter version of this sock.  Now what?
Well, you need to do your math.  (This is why the Lord created calculators and scrap paper!)  If the total pattern repeat is designed to be 1 3/4 inches tall, and you want a shorter sock, no problem.  First, knit a swatch including two pattern repeats.  Measure your row gauge.  Does it match the pattern?  If yes, cool.  You'll want to decrease in whole repeats to maintain the look, so you'll decrease the finished size by increments of 1 3/4 inches.  If the total sock has a 12 inch leg, with each full pattern repeat you take out, you subtract 1 3/4 inches. Originally there were 6 repeats + cuff = 7 units of height.  Don't take off the cuff - it anchors the look.  Remove one or more of the leg motif repeats.

Total length in inches - (number of repeats x 1.75 inches) = new total length. 

But what if your row gauge doesn't match the pattern?  Well, there are two ways to go - try to get the row gauge, or live with your unique gauge.  I tend to go with the one that matches the pattern, because it retains the original shapes in the design.  If your stitches are right on, and rows are off, you have the right needle size, but not the right material.  Too few rows mean you need stickier needles (bamboo like Clover, or non-slippery plastic, like Denise) and too many rows mean you need slippery needles (Addi's or Boye.)  If this works, you're all set to move on. 

If you're already using the recommended needle material, it's probably you.  Maybe you knit a little tightly, or a little loosely by nature.  No worries.  Stick with your unique gauge.  Then to get the dimensions in the pattern, you may need to knit more or fewer total rows.  If you're knitting at 1 1/2 inches per pattern repeat, you'll need to do 7 repeats + cuff = 8 total to make it the length specified in the pattern. The design will look like a shorter, fatter version of the original, and if you like it, go with it. (If not, pick a new pattern!)

(Total length) 12 / 1.5 (height of repeat) = 8

Wouldn't it be cool if it all worked out that way?  Well, it usually does.  But sometimes you want your garment to be longer or shorter in an increment different from the repeat.  If you have a 2 3/4 inch repeat and you only need 4 more inches, you won't be able to work in full pattern repeats and still get the measurements you want.  That means you either pick a different pattern, or you live with a partial repeat somewhere.  Put the partial repeat in the less visible part of the garment, usually the bottom.  You'll do your regular math of

Row gauge x total desired length = total number of rows - then -

Total # of rows / number of rows in one repeat = number of repeats, with the remainder being the number of extra rows

If you need to do a partial repeat at the bottom, you'll want to work the top part of the pattern in the extra rows.  If you need to do a partial repeat at the top, do the bottom part of the pattern. 

You can do this.  Get some coffee or tea, and your scrap paper and calculator, and do the math first.  Sketch it on some graph paper to make sure it makes sense.  Write out your new directions as thoroughly as possible so you don't have to do the work again.  Then, get knitting!

Tuesday, June 7, 2011

Knitting Math 3 - Long Pattern Repeats - Centering

Now that we've given our calculators a workout with the short pattern repeat, the next question is: What do you do with a long pattern repeat that needs to be modified?  Well, it depends on what it is you're trying to do.  How long is a long pattern repeat?  If it feels long to you, it's long, but usually it's anything that runs more than an inch and a half or more.  Some repeats can run a foot or more!
Patterns that are within a gament are often called "motifs", and we will call them that here.

If you're making a flat-knit piece, it is a little easier than if you're making a project in the round, or even a garment with sleeves. Let's start there.


Above is the Flower Chart from the Soria Vest by Mari Muinonen, originally published in Knitty, Winter 2009.  This is a beautiful, long pattern repeat (motif).  If the gauge is 5 stitches per inch, this covers over 3.5 inches.

First, take a long look at the motif you want to use.  Looking at the chart above, you can see that the column of stitched marked "1" is a connecting column.  It isn't part of just one flower; it's how you would connect several together.  If you only want one of the flowers, you need to ignore this column entirely, making your pattern now 17 stitches wide.  (I tend to hide the unused column with sticky notes so I won't get confused.)  Because 17 is an odd number, centering it pretty easy.  You would center it on the column numbered "10" of the motif chart.  How do you center it on the garment?  Let's say the garment is 51 stitches wide.

Centering = total number of stitches - stitches in repeat = # of background stitches. 
# of background stitches/2 = # of stitches to knit before inserting your repeat, and the number of background stitches to knit after your repeat.

or 51-17 =34.  34/2 = 17, so there would be 17 background stitches followed by the flower pattern, followed by 17 more background stitches per row.

That wasn't so hard.  But what if you wanted three flowers across?  This is when it helps to photcopy, cut and tape charts together, or grab some knitting graph paper and draw exactly what you want to do.

In order to get the pattern centered, we've already determined that we need the flower (without connectors) to have 17 stitches on either side of it.  The flower will need a connector on each side to join it to the next flower, making 19 stitches wide.  This leaves 16 stitches before and 16 stitches after the centered flower.  To make this work, you need to leave off the first two columns of the pattern in the first flower, then follow the whole chart once (connector plus flower), then follow the first 17 stitches of the pattern again for the third flower (connector plus 16 stitches of the flower).

When you draw this, start with a graph 51 stitches wide, and start on the center stitch (number 26).  You're going to draw this so that if you fold the paper in half lengthwise, the stitches to the right of stitch 26 will mirror the stitches to the left of it. Center just the first flower.  Next, add a connector column to each side.  Then, add the left 16 stitches to the right side, and the right 16 stitches to the left side.  See how nicely that worked?  Now you have a chart representing exactly the stitches you plan to knit - there's nothing left to keep in your head.  Just follow your hand-drawn chart.

The centering equation will always work, unless you end up with an odd number of background stitches.  When this happens, you can usually add one stitch to the total number of background stitches so that it will balance from side to side.  If you can't even out the number of background stitches, you'll have to decide whether you can live with it being off by one stitch, or whether you need to choose a new motif.

Next time, I'll tell you about combining motifs, as you would in a Fair Isle type garment. 

Thursday, June 2, 2011

Knitting Math 2 - short pattern repeats

Pattern repeats add a variable to knitting math.  The basic factors in knitting math are the stitch count per inch, and the row count per inch.  But what about the pattern repeat?  In this example, we'll work in the round, so the repeat has to line up exactly.


These mittens are my everyday winter mittens.  They have a "pattern repeat" of 4 stitches (2/3 of an inch, or .6666).  The stitches per inch is 6.  What does that matter?  Well, you'll need both numbers if you need to adjust the pattern to fit some other size.  Pattern repeat = 4 stitches in 2/3 of an inch.  Stitch count  = 6 stitches per inch.

My hand and the gauge and the original pattern all work out to the same size (I wear a mitten that's 8.25 inches around) so it works out nicely.  But my husband's hand is larger than the original pattern, so for him I'll have to modify to make it fit.  If I only mind the stitches per inch (6), my mitten will have a weird jog in it where the pattern doesn't line up, because the pattern repeats in 4s , not 6s. The mittens are stranded, which keeps them from being very stretchy, so I can't rely on stretch to save me if they're a little small.  What to do?

Well, the pattern repeat of 4 stitches = 2/3 of an inch.  If I measure my husband's hand, I discover that he needs a mitten that's 9.4 inches around.  If I take a look at the original pattern, I see that the pattern repeats 12 times in 8.25 inches (or six times on the front and six on the back).  Now I need to subtract 8.25 inches (pattern size) from 9.4 inches (the size I need for my husband).  I get 1.15 inches that need to be added to make a mitten to fit the hubby.  Size I have - size I need = amount of room I need to add (or subtract).

If I divide that 1.15 extra that I need by the pattern repeat of .6666 inches, I get 1.75, or one and three quarters of a repeat.  That means I need 7 more stitches around to make the mitten exactly my husband's size.  One more stitch (8 stitches) gives me a perfect pattern repeat of 2 (4 stitches in the repeat twice), or only one extra stitch over the entire circumference of the mitten.  I can work with that!  So, to make the mittens for my husband, I would need to add 8 stitches to the pattern, and just work those repeats in with the original pattern.  I can work the decreases at the top by starting them at the tip of the hubby's little finger, and follow the decreases a few extra times until I run out of stitches.
Amount of change in inches / length of pattern repeat in inches = number of pattern repeats needed.
Number of pattern repeats needed x pattern repeat in stitches = number of stitches to add.

The thumb is a pattern repeat of 2 (which is 1/3 of an inch), so that math is really easy.  I measure the original, subtract that measurement from the hubby's thumb measurement, and discover I need 3/4 of an inch extra.  That's 4 and 1/2 stitches.  I can afford to be a stitch short or a stitch over, so I choose over.  (Tight thumbs stink!)  I round the 4.5 stitches I need up to the next even number (6) to accommodate the pattern repeat, and I'm done.

Short pattern repeats give you more flexibility to modify size than long ones, but we'll work with long ones in the next article.  Knitting math isn't hard if you know the formulas and you have a calculator.  You can do it!